Home › Devices › Sega › Sega Game Gear
 NEW!
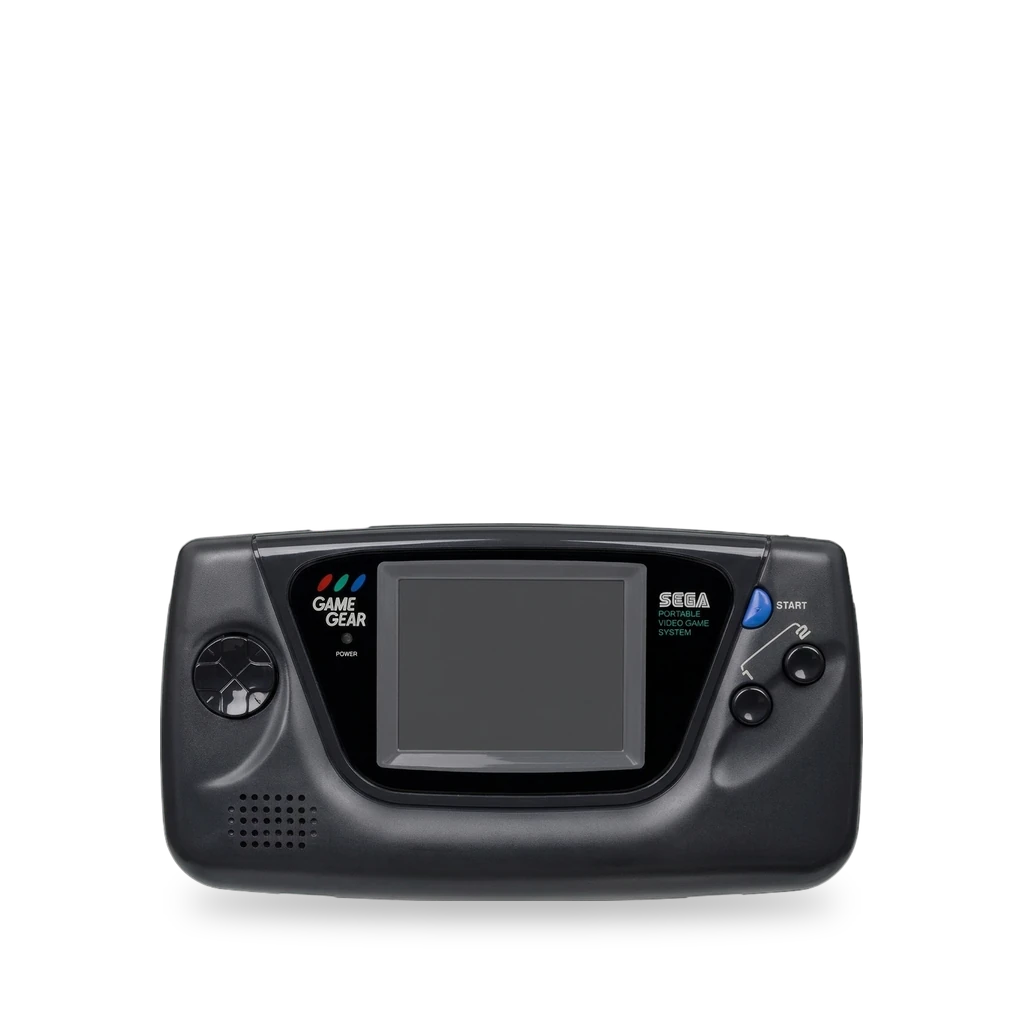
Photo: Evan-Amos, Public domain · AI-edited (studio background)

SEGA · HANDHELD CONSOLE · 1991
Sega Game Gear
Also called: Game Gear · 2110
Sega's color handheld, model 2110, released in North America in 1991. After 20 or more years the capacitors leak. That can look like a console that powers on and straight back off, weak or dead sound, or a dim screen.[1][2]
Which one do I have?
Specs
Mods (11)
⚠ Mod at your own risk. We collect what others have published; we have not tested these mods. Read the safety notes
Flash cartridgeWorks
- ⚠ Check the law May break a law or rule where you live.
A Krikzz EverDrive GG X7 plugs into the cartridge slot and runs your own Game Gear and Master System backups. The case stays closed.[3]
Parts
- EverDrive GG X7 Fits — Plugs into the Game Gear cartridge slot. Uses a microSD card.[3]
Good to know
- Game Gear and Master System software is supported. The cart holds up to 4 MB, with 32 KB of save RAM, save states, and an in-game menu.[3]
- A soft reset returns to the menu. The cart uses a microSD card, gold-plated contacts, and a four-layer board. The menu OS allows up to 1000 files in a folder.[3]
Guides:No guide found yet.
Replace the capacitorsWorks
- ⚠ Soldering Needs a soldering iron. Heat can lift pads and burn skin.
After 20 or more years the surface-mount capacitors leak. A failing set can make the Game Gear power on and straight back off, lose sound, or dim the screen. Replace one capacitor at a time. The values depend on the board.[2]
Special tools: Gamebit 4.5 mm, soldering iron
Good to know
- The capacitors are surface-mount. Melt the solder on each leg and pull the part free. Do one capacitor at a time so the values do not get mixed up.[2]
- Two ASIC chips on the right side of the board should mean a VA1. One ASIC is likely a VA4. Check the VA number on the left edge. If your board is not listed, copy the values printed on the old capacitors.[2]
- The power-board values change with the main board. The guide gives sets for boards marked 837-9025, 837-7720-01, and VA4 837-9538. The audio board uses one set of values.[2]
⚠ Watch out
- Match the capacitor set to the board in front of you. Power-board parts differ: a VA4 837-9538 board needs one more capacitor (C9) than the 837-9025 and 837-7720-01 boards.[2]
Guides:Sega Game Gear Capacitor Replacement - iFixit Repair Guide
USB-C power boardExperimental
The RetroSix CleanJuice AA pack replaces the original power board. It is a drop-in: no soldering and no cutting. It charges by USB-C, in place of the DC jack, and runs on six NiMH AA cells.[4][5]
Parts
- CleanJuice AA USB-C pack Fits — Drop-in replacement for the original power board. No soldering and no cutting. Uses six NiMH AA cells.[4][5] Buy: dragonbox.de · dragonbox.de
Good to know
- The pack replaces the original power board with a USB-C board. The install is drop-in, with no soldering and no cutting, and it works with six NiMH AA cells.[4]
- It replaces the original DC jack and is listed as compatible with the CleanScreen V4 and the CleanAmp.[4]
Guides:No guide found yet.
Open the caseWorks
The shell opens with a Phillips #00 screwdriver and a 4.5 mm Gamebit. Start with the two battery compartments on the back.[6]
Special tools: Phillips #00 screwdriver, Gamebit 4.5 mm
Guides:Sega Game Gear Case Replacement - iFixit Repair Guide
New speakersWorks
Replace the speakers. The guide starts by opening the two battery compartments.[7]
Special tools: Phillips #0 screwdriver, tweezers
Guides:Sega Game Gear Speakers Replacement - iFixit Repair Guide
Original screenWorks
Fit a replacement for the original screen. The guide uses a 4.5 mm Gamebit and a Phillips #00 screwdriver, and starts at the battery doors.[8]
Special tools: Gamebit 4.5 mm, Phillips #00 screwdriver
Guides:Sega Game Gear Screen Replacement - iFixit Repair Guide
CleanScreen V4Experimental
A RetroSix 640×480 IPS kit. The install is wire-free, with pre-made ribbon cables. It is listed for VA0, VA1, VA2, VA4, and VA5, and the shop also says VA0 to VA5.[4]
Parts
- RetroSix CleanScreen V4 Fits with conditions — Listed for VA0, VA1, VA2, VA4, and VA5. The shop also says VA0 to VA5.[4] Buy: dragonbox.de
Good to know
- The panel is 640×480. A triple frame buffer is meant to stop tearing and stutter, including at NTSC and Japanese refresh rates.[4]
- Integer scaling keeps the pixels crisp. Infinity Scaling changes the image size. Scanline and pixel-grid effects are included. A CleanScreen app can upgrade Core to Pro or Ultra.[4]
Guides:No guide found yet.
McWill LCDExperimental
McWill's replacement LCD is a 320×240 panel with seven picture modes. Hold 1, 2, and Start to move through them.[9]
Good to know
- The modes include the Game Gear's 160×144 picture stretched to 320×240, a doubled picture with the top and bottom cropped, scanline versions of those, and the native 160×144 picture centered on the panel.[9]
Guides:No guide found yet.
BennVenn VA4 IPS kitExperimental
- ⚠ Soldering Needs a soldering iron. Heat can lift pads and burn skin.
A BennVenn kit for the VA4 ASIC, which is also in the VA5 and the Majesco. It is not for VA0 or VA1. You solder 10 wires and follow install pictures. The maker calls it a very do-it-yourself kit.[10]
Special tools: soldering iron
Parts
- BennVenn Game Gear VA4 IPS kit Fits with conditions — For VA4, VA5, and Majesco. Not for VA0 or VA1.[10] Buy: bennvenn.myshopify.com
Good to know
- The VA4 ASIC, also used in the VA5 and the Majesco, shows 512 colors. VA0 and VA1 show 4096. This kit does not support Master System mode or the TV tuner.[10]
- The kit has a frame-locked Game Gear mode, four scaling options, and scanlines. A VA4 and VA5 install guide is available.[10]
⚠ Watch out
- You solder 10 wires and work from install pictures. Help is on the maker's Discord.[10]
Guides:No guide found yet.
1-ASIC rebuild kitExperimental
A RetroSix pack for 1-ASIC Game Gears. It includes a RePCB motherboard, a CleanScreen V4, a CleanAmp Duo, a GameSlot cartridge socket, and a CleanJuice AA USB-C pack. The shop will install it.[5]
Parts
- RetroSix RePCB ultimate pack Fits with conditions — The RePCB in this pack is for 1-ASIC models.[5] Buy: dragonbox.de
Good to know
- The pack's motherboard is a RePCB for 1-ASIC models. It also includes the CleanScreen V4, the CleanAmp Duo (stereo and mono), a serviceable GameSlot cartridge socket, and the CleanJuice AA USB-C pack.[5]
⚠ Watch out
- The replacement motherboard is listed for 1-ASIC Game Gears.[5]
Guides:No guide found yet.
SYF board and GGHD screenExperimental
- ⚠ Soldering Needs a soldering iron. Heat can lift pads and burn skin.
- ⚠ Lithium battery Uses or touches a lithium cell. A damaged cell can catch fire.
One modder's rebuild: a reverse-engineered SYF motherboard and a BennVenn GGHD revision 3 screen. That screen is limited to VA0 and VA1 boards. This is a one-off build, not a kit guide.[11]
Good to know
- The builder moved the ASIC, link port, and cartridge reader from a donor board onto an SYF board, using a desoldering gun. The SYF board has a region switch for North American and Japanese settings.[11] unverified
- The screen in that build is a BennVenn GGHD revision 3, a 640×480 IPS panel with scanlines, scaling, and HDMI. It is limited to VA0 and VA1 motherboards.[11] unverified
- The original Game Gear used six AA batteries and a fluorescent backlight, lasting 3 to 5 hours, and a 3.2-inch 160×144 screen with 32 colors. That build used two 2000 mAh lithium-ion cells charged by USB-C.[11] unverified
Guides:No guide found yet.
Buttons & modes
| What | How |
|---|---|
| McWill picture mode | Hold 1, 2, and Start to move through the seven picture modes.[9] |
Sources (11)
- wiki Sega Game Gear Repair Help: Learn How to Fix It Yourself - iFixit · 2026-11-14
- wiki Sega Game Gear Capacitor Replacement - iFixit Repair Guide · 2026-11-14
- official EverDrive GG X7 · 2026-11-15
- shop Game Gear CleanScreen Kit V4 – RetroSix IPS Upgrade - DragonBox · 2026-11-14
- shop Game Gear Ultimate Rebuild Pack – RetroSix DIY Kit - DragonBox · 2026-11-14
- docs Sega Game Gear Case Replacement - iFixit Repair Guide · 2026-11-15
- docs Sega Game Gear Speakers Replacement - iFixit Repair Guide · 2026-11-15
- docs Sega Game Gear Screen Replacement - iFixit Repair Guide · 2026-11-15
- blog Game Gear LCD Replacement – RetroRGB · 2026-11-15
- shop Game Gear VA4 / VA5 / Majesco IPS Kit – BennVenn's Shop · 2026-11-15
- news SEGA Game Gear gets overhauled with an HD IPS screen and USB-C charging as YouTube modder pulls out all the stops - Notebookcheck News · 2026-11-14