Home › Devices › Nintendo › Game Boy Micro
 NEW!
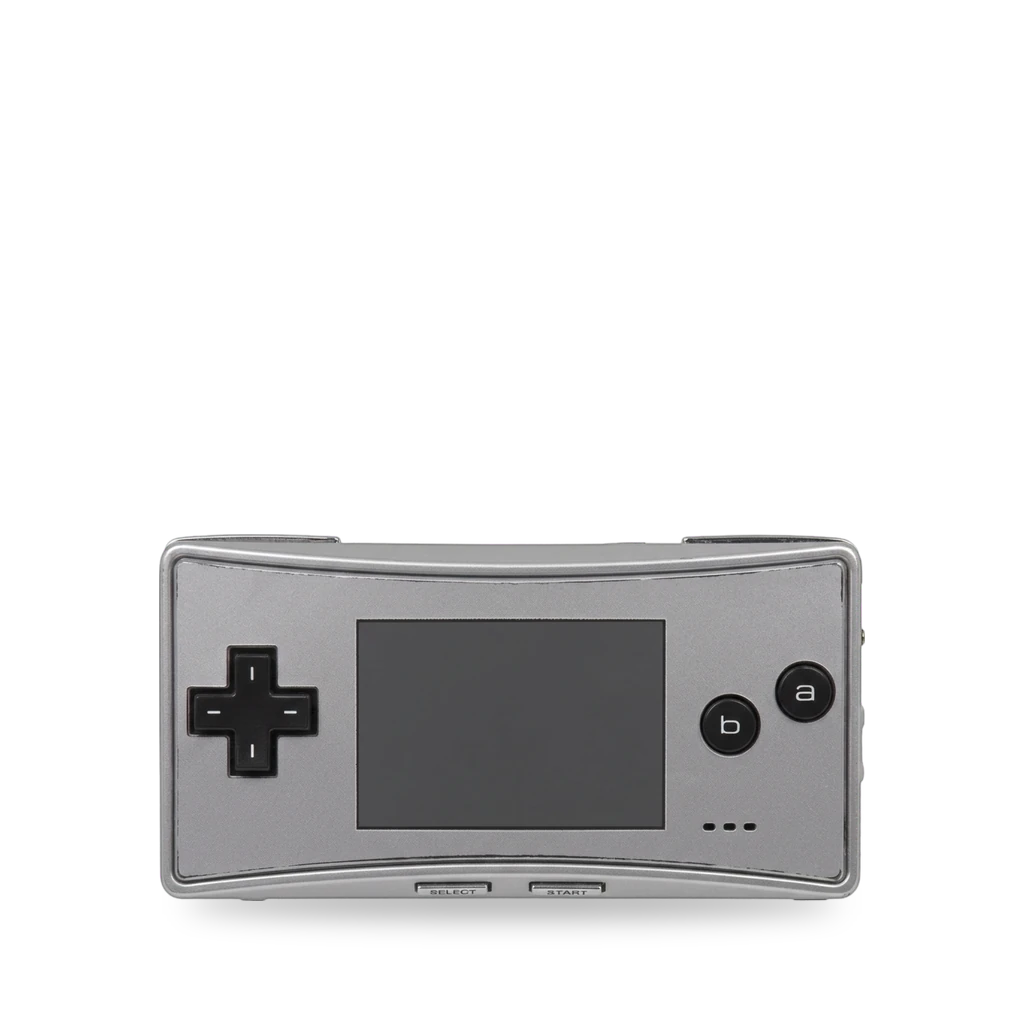
Photo: Evan-Amos, CC BY-SA 3.0 · AI-edited (studio background)

NINTENDO · HANDHELD CONSOLE · 2005-2008
Game Boy Micro
Also called: GBM · OXY-001 · Oxy · Nintendo Game Boy Micro
Tiny GBA-only handheld (codename Oxy). Removable battery, faceplate and shell swaps, like-for-like LCD replacement, USB-C charge boards, and a DIY link-port dongle.[1][3][4][10][14][17][2]
Which one do I have?
Specs
Mods (8)
⚠ Mod at your own risk. We collect what others have published; we have not tested these mods. Read the safety notes
Replace the batteryWorks
- ⚠ Lithium battery Uses or touches a lithium cell. A damaged cell can catch fire.
One side screw frees the battery cover. Unplug the old Li-polymer cell and plug in a replacement. Like-for-like packs are sold around 460 mAh.[3][7][8][9]
Special tools: Phillips #00 screwdriver, non-conductive flat tool
Parts
- Hand Held Legend 460 mAh pack Fits with conditions — Listed 3.8 V 460 mAh; may need a small trim on the port to fit.[7] Buy: handheldlegend.com
- BatteryWeb 3.7 V 460 mAh (OXY-003 / GPNT-02) Fits — Listed for OXY-003 or GPNT-02; shop says it was bench-tested in an OXY-001.[8] Buy: batteryweb.com
- Battery Mart 3.7 V 460 mAh Li-Poly Fits — Title says 0.5 Ah; spec line says 460 mAh.[9] Buy: batterymart.com
Good to know
Higher-capacity battery modExperimental
- ⚠ Lithium battery Uses or touches a lithium cell. A damaged cell can catch fire.
A reversible mod with a 750+ mAh cell (802535 style recommended), shown in a video.[2]
Good to know
- The page calls it a cheap, high-capacity (750+ mAh), fully reversible battery mod and recommends a better 802535 cell than the one shown in the video.[2]
Guides:No guide found yet.
Shell and faceplateWorks
Swap the outer backplate and faceplate, or fit a full aftermarket housing kit. Silver OEM frames can crack at the faceplate clips.[4][2][12][13]
Special tools: Phillips #00 or tri-wing screwdriver, SIM tool or bent paperclip
Parts
- ZedLabz full housing shell kit Fits — Micro only. Includes top/bottom housings, battery cover, screws and gloss lens. Sold out when checked.[12] Buy: zedlabz.com
Good to know
- Side screws may be Phillips #00 or tri-wing depending on the unit.[4]
- The faceplate is held by two plastic clips near the battery screw; release them through the holes with a bent paperclip or SIM tool.[4]
- Some silver units use brittle plastic that fails at the faceplate clips; options include re-sticking, 3D-printed clips, or a full 3D-printed front frame.[2]
⚠ Watch out
Replace the buttonsWorks
Open the shell and swap face buttons and shoulders. Aftermarket L-button moulds may be missing a tab.[6][11][5]
Parts
- Hand Held Legend Game Boy Micro buttons Fits with conditions — Left shoulder mould is incorrect and missing a tab; buy only if you do not need L.[11] Buy: handheldlegend.com
Good to know
Replace the LCDWorks
Like-for-like panel swap through a motherboard teardown. Not an IPS upgrade; OEM screens may need trimpot calibration.[5][10][2]
Parts
- Hand Held Legend Game Boy Micro LCD Fits — Like-for-like replacement panel. Foam adhesive may or may not be included.[10] Buy: handheldlegend.com
Good to know
- iFixit covers LCD removal with the motherboard; difficulty Difficult, about 30–45 minutes.[5]
- OEM screens, including the Micro, must be calibrated with a delicate trimpot on the motherboard.[2]
⚠ Watch out
USB-C chargingExperimental
- ⚠ Soldering Needs a soldering iron. Heat can lift pads and burn skin.
- ⚠ Lithium battery Uses or touches a lithium cell. A damaged cell can catch fire.
- ⚠ Permanent change Cuts, drills or glues the device. You cannot undo it.
A small board replaces the proprietary charge connector with USB-C. Soldering required. This kind of mod can lose the link port.[14][15][16][2]
Special tools: soldering iron, tri-wing and Phillips screwdriver, Kapton tape
Parts
- Giltesa USB-C mod board Fits — Maker lists exact shape for Game Boy Micro. Tools and soldering iron required. PD chargers at normal speed only.[14][15] Buy: tindie.com · lectronz.com
- YuxiaoTech USB-C charging kit Fits — Seller page said the shop was taking a break when checked.[16] Buy: tindie.com
Good to know
- Giltesa's board replaces the original charging connector with USB-C and lists multiplayer through an adapter as a feature.[14]
- The original Micro charging cable is proprietary and hard to find.[16]
- Game Boy Resource says a USB-C charge-port replacement can lose link-port functionality.[2]
Guides:No guide found yet.
Link-port dongle (GBA peripherals)Works
- ⚠ Soldering Needs a soldering iron. Heat can lift pads and burn skin.
DIY OXY-Dongler board lets Game Boy Advance peripherals plug into the Micro. Build from the open-source README; soldering required.[17][2]
Special tools: soldering iron
Good to know
- The dongle lets Game Boy Advance peripherals be used on a Game Boy Micro.[17]
- Two board versions: a solid board, and a breakaway board that splits into two halves joined by six conductors.[17]
- Both ports must be soldered on the same side of the board. Parts include a cheap Micro USB charging cable and a bare AGB/AGS EXT port.[17]
- Charge pins on the Micro EXP connector are pinned out but not connected to the AGB EXP connector.[17]
Guides:OXY-Dongler - makhowastaken
GBA link cable adapterExperimental
A ready-made adapter lets a standard GBA link cable plug into the Micro. Stock may be ending.[18]
Parts
- Hidarite link cable adapter Fits — Seller said the product would likely be discontinued after stock ran out, and the shop was on a break.[18] Buy: tindie.com
Good to know
- The adapter lets you connect a Game Boy Micro with a standard GBA link cable.[18]
⚠ Watch out
- The seller says they are not responsible for damage to your system.[18]
Guides:No guide found yet.
Sources (18)
- wiki Game Boy Micro - Wikipedia · 2026-11-17
- docs Game Boy Micro - Game Boy Resource · 2026-11-17
- docs Game Boy Micro Battery Replacement · 2026-11-17
- docs Game Boy Micro Outer shell Replacement · 2026-11-17
- docs Game Boy Micro Motherboard Replacement · 2026-11-17
- shop Rechargeable Battery Replacement for Game Boy Micro · 2026-11-17
- shop Nintendo Game Boy Micro Replacement Battery, 3.7V, 460mAh · 2026-11-17
- shop Replacement Nintendo Game Boy Micro Battery · 2026-11-17
- shop Game Boy Micro LCD Replacement · 2026-11-17
- shop Full housing shell for Game Boy Micro console · 2026-11-17
- shop Game Boy Micro Accessories. OXY-001 Parts · 2026-11-17
- shop USB-C Mod for Game Boy Micro - giltesa (Tindie) · 2026-11-17
- shop Game Boy Micro: USB-C Mod - giltesa (Lectronz) · 2026-11-17
- shop USB-C Charging Mod Kit - YuxiaoTech · 2026-11-17
- official OXY-Dongler - makhowastaken · 2026-11-17
- shop Link cable adapter for Game Boy micro - Hidarite · 2026-11-17