Home › Devices › Nintendo › Game Boy
 NEW!
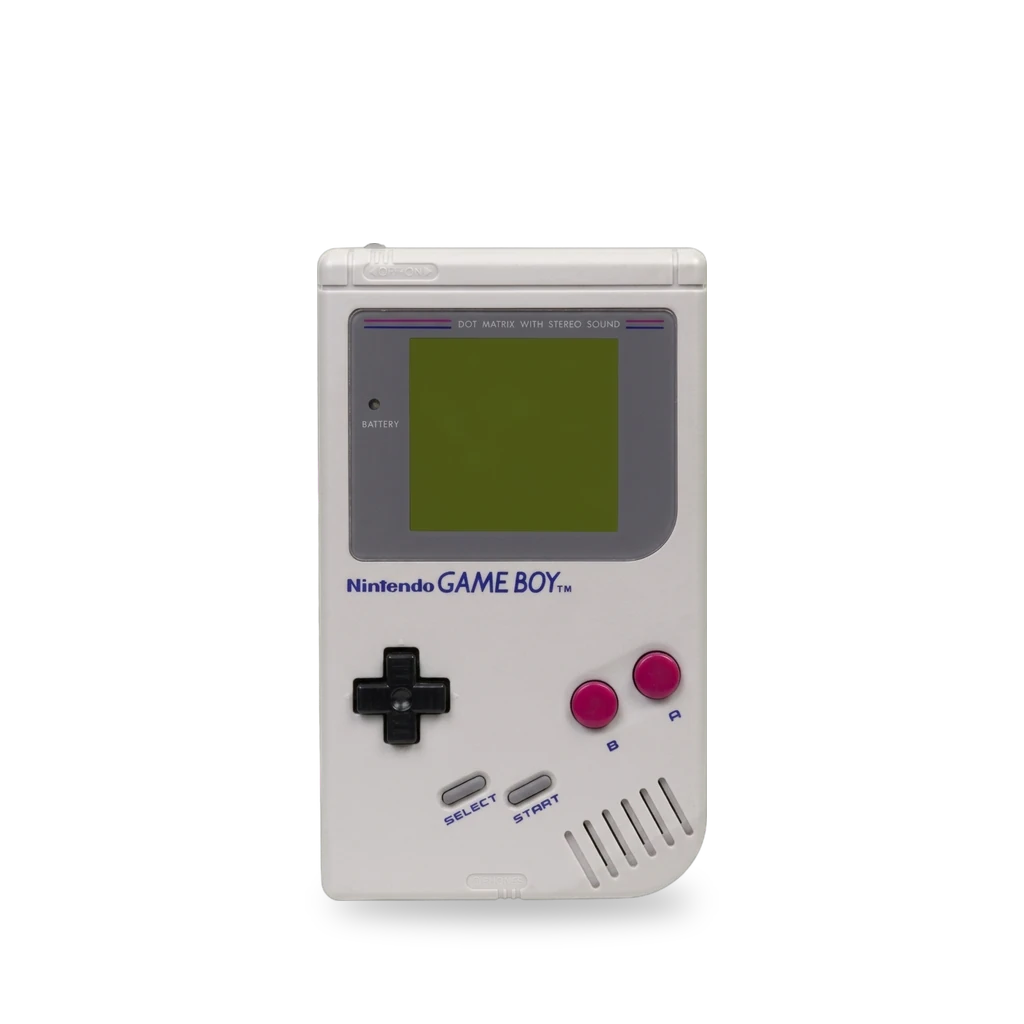
Photo: Evan-Amos, Public domain · AI-edited (studio background)

NINTENDO · HANDHELD CONSOLE · 1989
Game Boy
Also called: original Game Boy · DMG · DMG-01 · Game Boy classic
The original Game Boy, model DMG-01, from 1989. It has a 2.6-inch green screen and runs on four AA batteries. Common mods fit a color IPS screen (one kit leaves the shell alone, one needs a cut), a rechargeable cell, a new power board, clearer audio, a bivert for the stock LCD, or a MIDI link.[1][2][3][8][9][10][5][7]
Which one do I have?
| Model | Variant | Year | How to tell |
|---|---|---|---|
| DMG-01 | Original Game Boy | 1989 | The model number DMG-01 is on a label on the back.[1] |
Specs
Mods (10)
⚠ Mod at your own risk. We collect what others have published; we have not tested these mods. Read the safety notes
Same-size IPS screenWorks
- ⚠ Soldering Needs a soldering iron. Heat can lift pads and burn skin.
The RetroSix kit keeps the original resolution and swaps the front board. It does not cut the shell. The original speaker has to move onto the new board.[2]
Parts
- RetroSix DMG IPS screen kit Fits — No shell cut. Move the original speaker onto the new front board, or fit a new speaker.[2] Buy: dragonbox.de
Good to know
- The kit includes an IPS LCD at the original resolution, a replacement front board, a back board, a bracket, and ribbon cables.[2]
- Brightness uses the contrast wheel. Color palettes use the contrast-wheel button.[2]
- An IPS screen draws more current than the original panel. RetroSix recommends the CleanPower regulator for stable power.[2]
⚠ Watch out
- Desolder the original speaker from the old board and solder it onto the new front board, unless you fit a new speaker.[2]
Guides:No guide found yet.
Larger IPS screenWorks
- ⚠ Soldering Needs a soldering iron. Heat can lift pads and burn skin.
- ⚠ Permanent change Cuts, drills or glues the device. You cannot undo it.
The FunnyPlaying Q5 kit is larger than the original glass. It needs a shell cut and two soldered wires.[3][4]
Parts
- FunnyPlaying RetroPixel Q5 IPS kit Fits with conditions — Cut the screw posts and enlarge the viewport, and solder two wires. The panel is about 11% larger than the original.[3][4] Buy: retromodding.com · funnyplaying.com
Good to know
- The Retro Modding kit includes a front board with button contacts, a ribbon cable, a glass lens, and a bracket. It has eight color modes, and brightness control takes the place of the contrast wheel.[3]
- FunnyPlaying's kit draws about 0.3 W to 0.8 W. The viewable area is about 11% larger than the original glass, so it needs a larger lens. An on-screen menu covers palettes, battery voltage, and simulated pixel lines.[4]
Guides:No guide found yet.
Higher-contrast LCD (bivert)Works
- ⚠ Soldering Needs a soldering iron. Heat can lift pads and burn skin.
- ⚠ Permanent change Cuts, drills or glues the device. You cannot undo it.
Keep the original LCD. Invert the pixel data with a small board, then rotate the polarizer 90 degrees so the greys look right and contrast rises.[5]
Good to know
- Biverting inverts the LCD pixels once digitally and again optically, which raises contrast while keeping black as black and light grey as light grey.[5]
- The digital step needs an inverter circuit. The optical step is a 90-degree polarizer rotation.[5]
Guides:No guide found yet.
Rechargeable batteryWorks
- ⚠ Lithium battery Uses or touches a lithium cell. A damaged cell can catch fire.
A 2500 mAh lithium-ion cell made for the CleanJuice DMG rechargeable module. The module is a separate part.[8]
Parts
- CleanJuice DMG 2500 mAh lithium-ion cell Fits with conditions — Fits the CleanJuice DMG rechargeable module, which is a separate part.[8] Buy: handheldlegend.com
Good to know
- The cell is 2500 mAh and is made for the CleanJuice Game Boy DMG rechargeable module.[8]
Guides:No guide found yet.
Louder speakerWorks
- ⚠ Soldering Needs a soldering iron. Heat can lift pads and burn skin.
A Class D amplifier that replaces the original amplifier, for louder and clearer sound. Needs basic soldering.[10]
Parts
- CleanAmp audio amplifier Fits — Replaces the original amplifier on the original Game Boy. The shop lists it as discontinued, and the speaker is sold separately for the original Game Boy.[10] Buy: handheldlegend.com
Good to know
- The same board replaces the amplifier on the original Game Boy, the Color, the Pocket, and the Advance.[10]
Guides:No guide found yet.
Replacement power boardWorks
- ⚠ Soldering Needs a soldering iron. Heat can lift pads and burn skin.
A RetroSix board that replaces the original power regulator. Sold for a faded screen or a dying power board. Desolder the old wires and solder them onto the new board.[9]
Parts
- CleanPower DMG regulator board Fits — Replaces the original DC power-regulator board. The shop lists it as discontinued.[9] Buy: handheldlegend.com
Good to know
- The board replaces the original regulator with a modern supply, meant to stop a faded screen or a failing power board.[9]
Guides:No guide found yet.
MIDI linkWorks
An Arduino on the link port gives MIDI and sync. It can take power from the link port. The case stays closed.[7]
Good to know
- ArduinoBoy is serial MIDI over the link port. A button selects among seven sync and state modes.[7]
- Mode 1 syncs LSDJ as a slave to a MIDI sequencer or DAW, including tempo resolution, start, and stop.[7]
- In its mGB mode it takes MIDI in on all Game Boy audio channels, and a polyphonic mode plays the Game Boy as a synth module.[7]
- The interface can be powered from the link port. It was tested on the original Game Boy, the Game Boy Color, and the Game Boy Advance and Advance SP.[7]
Eurorack synthExperimental
- ⚠ Permanent change Cuts, drills or glues the device. You cannot undo it.
A 2013 project that builds an original Game Boy into a Eurorack modular synth for LSDJ. This is one write-up, not a kit.[6]
Good to know
- A 2013 Hackaday post describes the Gieskes Euroboy, which puts an original Game Boy into a Eurorack setup running LSDJ.[6] unverified
- The mod taps the cartridge connector with a repeat signal for slowed, noisy LSDJ signals, adds pitch control by control voltage, and raises the audio output to 10 V peak-to-peak.[6] unverified
Guides:No guide found yet.
Replacement motherboardExperimental
- ⚠ Lithium battery Uses or touches a lithium cell. A damaged cell can catch fire.
- ⚠ Soldering Needs a soldering iron. Heat can lift pads and burn skin.
- ⚠ Permanent change Cuts, drills or glues the device. You cannot undo it.
An open-source board set that replaces a corroded DMG mainboard. It adds LiPo charging, a louder audio board, and an optional IPS front board.[11]
Good to know
- The project salvages corroded original Game Boy or Super Game Boy boards with a modern replacement PCB set.[11]
- A LiPo power board can supply the negative voltage for the original LCD, or turn that rail off for an IPS screen. An audio board drives a 1 W speaker or the original speaker, and a bivert chip is built in.[11]
Color rebuild in a DMG shellExperimental
- ⚠ Soldering Needs a soldering iron. Heat can lift pads and burn skin.
- ⚠ Permanent change Cuts, drills or glues the device. You cannot undo it.
Custom boards that keep the original Game Boy look and run Game Boy Color games, with a large IPS screen and a switch-mode power supply on four AAs or the DC jack.[12]
Good to know
- The build keeps the original Game Boy shell, link port, volume wheel, and power switch, and plays both Game Boy and Game Boy Color cartridges.[12]
- It uses a GBC Q5 XL IPS kit with on-screen controls mapped where the contrast wheel was, plus a modern switch-mode supply on four AA batteries or the DC jack.[12]
Sources (12)
- wiki Game Boy Repair Help: Learn How to Fix It Yourself - iFixit · 2026-11-14
- shop Game Boy Original IPS Screen Kit – RetroSix DMG Mod - DragonBox · 2026-11-14
- shop DMG RetroPixel Q5 IPS LCD Kit for Game Boy — Retro Modding · 2026-11-14
- shop DMG RetroPixel IPS Q5 LCD Kit – FunnyPlaying · 2026-11-15
- blog HHL Bivert Module V2 - technical review - gekkio.fi · 2026-11-16
- blog A Modular Game Boy Synthesizer | Hackaday · 2026-11-14
- docs GitHub - trash80/Arduinoboy: Official ArduinoBoy Repository for serial MIDI communication to the Nintendo Gameboy · 2026-11-14
- shop CleanJuice Game Boy DMG Original Li-Ion Battery 2500mAh | Hand Held Legend · 2026-11-14
- shop CleanPower DMG DC Power Regulator Board | RetroSix · 2026-11-14
- shop Game Boy CleanAmp v1.1 Audio Amplifier | Hand Held Legend · 2026-11-14
- docs GitHub - VISmodding/VIS_Game_Boy_DMG: Replacement PCB for the original gameboy DMG with 1 watt speaker, lipo battery and more... · 2026-11-16
- docs GitHub - MouseBiteLabs/Game-Boy-DMG-Color: An original Game Boy outfitted with Game Boy Color support and other modern features · 2026-11-16