Home › Devices › Apple › iPod Photo (4th gen color)
 CUSTOM FW!
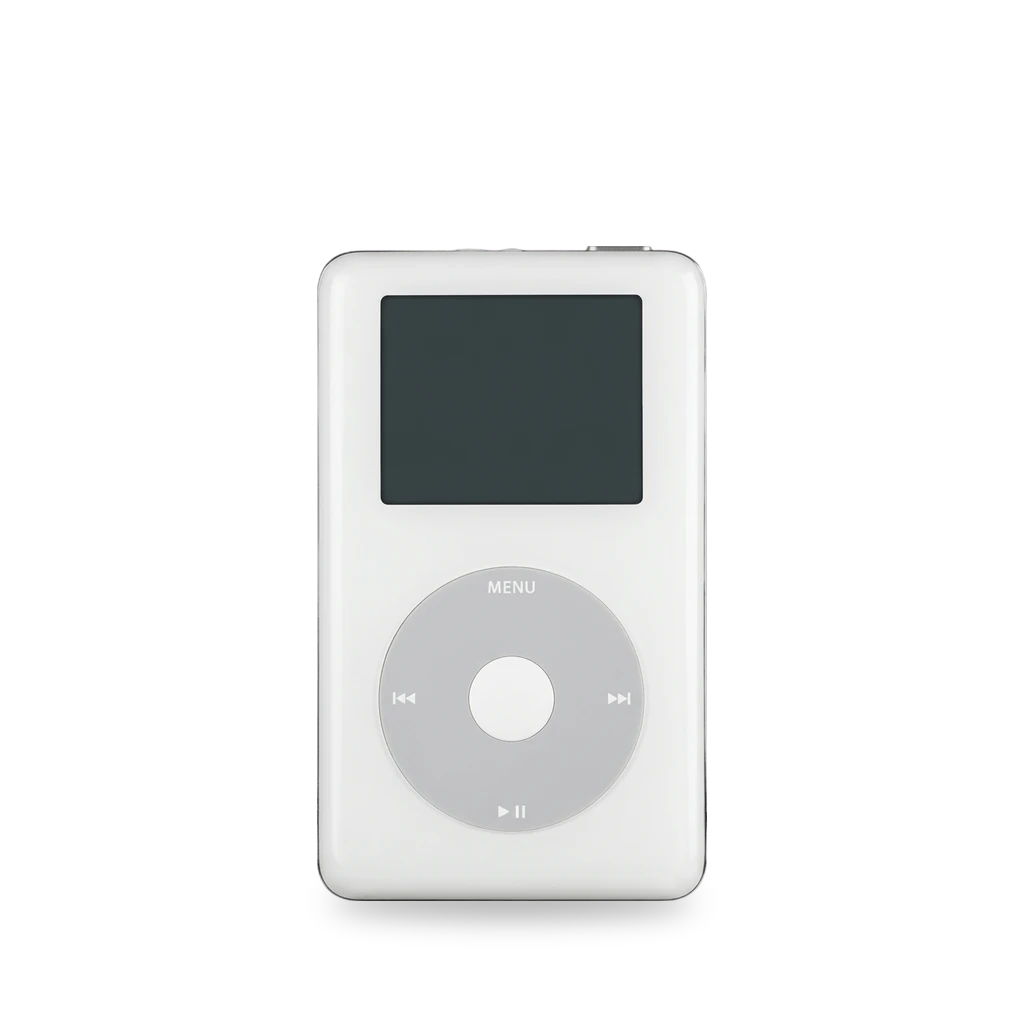
Photo: Tr-909, Public domain · AI-edited (studio background)

APPLE · MUSIC PLAYER · 2004-2005
iPod Photo (4th gen color)
Also called: iPod photo · iPod with Color Display · iPod Color · A1099 · 4th gen Photo
Click-wheel iPod with a 2-inch color screen for photos and slideshows (TV-out). Sold as iPod photo, later renamed iPod with Color Display. Mods match the monochrome 4th gen path: flash storage, battery swap, Rockbox, and display or shell repair. One DIY line-out audio mod exists for this chassis.[2][1][7][13][18]
Which one do I have?
| Model | Variant | Year | How to tell |
|---|---|---|---|
| A1099 | Photo 40 GB | 2004 | Back reads A1099. Order number M9585LL/A. Color 2-inch screen. Introduced with the 60 GB on 26 October 2004; discontinued 23 February 2005.[9][1][2] |
| A1099 | Photo 60 GB | 2004 | Same A1099 case. Order numbers M9586LL/A (early) and M9830LL/A (after 23 February 2005 per EveryMac).[9][1] |
| A1099 | Photo / Color Display 30 GB | 2005 | Spring 2005 revision added 30 GB (order M9829 per Low End Mac) and Camera Connector support. On 28 June 2005 the line was renamed iPod with Color Display.[8][7][10] |
Specs
| Screen | 2-inch color LCD with LED backlight[1] |
| Drive | 1.8-inch 4200 RPM Toshiba IDE hard disk (30 / 40 / 60 GB configurations)[8][1] |
| Battery | Built-in rechargeable lithium ion[1][10][7] |
| Ports | 30-pin dock (FireWire or USB sync/charge), remote connector, stereo minijack; TV-out for slideshows[1][8][2] |
| Chipset | PortalPlayer PP5020 at 80 MHz ×2; Wolfson WM8975 audio[9][11][10] |
Mods (6)
⚠ Mod at your own risk. We collect what others have published; we have not tested these mods. Read the safety notes
Flash storage (replace the hard drive)Works
- ⚠ Data loss Can erase what is on the device. Back up first.
Swap the IDE hard drive for an iFlash-ATA1 board or a CE-to-CF plus microSD stack. Solo, Dual, or Quad boards need the iFlash 4th gen converter.[13][14][15][12][16][17][5]
Special tools: iPod opening tool, spudger, T6 Torx
Parts
- iFlash-ATA1 Fits — Listed for 4th gen Photo 30/40/60 GB and Color 20/60 GB.[13][12] Buy: iflash.xyz
- iFlash 4th Gen Converter ribbon Fits — Needed to fit Solo/Dual/Quad boards in 4th gen iPods. Case-back identifiers include A1099.[14] Buy: iflash.xyz
- iFlash-Quad (4× microSD) Fits with conditions — Needs the 4th gen converter ribbon.[15][14] Buy: iflash.xyz
- CE-to-CF 1.8in adapter + CF-to-microSD Fits — iFixit guide covers Photo as well as monochrome 4th gen. Recommend 4–128 GB; wall charger may be needed to finish restore.[17]
Good to know
- iFlash adapters are made for the iPod Photo. ATA1 covers Photo 30/40/60 GB and Color 20/60 GB.[12][13]
- Open with Hold locked; release five tabs on the right seam with a pick.[5]
- SDXC cards of 64 GB and above come formatted ExFAT; the iFlash guide rebuilds the MBR and creates a FAT32 partition.[16]
⚠ Watch out
- After a microSD swap, the iPod prompts you to connect a wall charger to finish the restore; the computer connection alone is not enough.[17]
Guides:iPod 4th generation or Photo hard drive replacement by micro SD card - iFixitiPod 4th Generation or Photo Rear Panel Replacement - iFixit
Rechargeable batteryWorks
- ⚠ Lithium battery Uses or touches a lithium cell. A damaged cell can catch fire.
Open the case, remove two T6 Torx screws, lift the hard drive, and swap the pack by its leads. Like-for-like replacement.[4]
Special tools: iPod opening tool, spudger, T6 Torx
Good to know
- Remove two black T6 Torx screws from the left side of the logic board and lift the hard drive to reach the battery.[4]
- Lift the battery by its leads; pry adhesive if needed. Pull the connector by its body, not the cables.[4]
Guides:iPod 4th Generation or Photo Battery Replacement - iFixit
Rockbox custom firmwareWorks
- ⚠ Can brick A mistake can leave the device unable to start.
- ⚠ Data loss Can erase what is on the device. Back up first.
Open-source firmware. Photo / Color are stable Rockbox targets with Rockbox Utility bootloader install.[18][7][19]
Good to know
- The iPod Photo is a stable Rockbox target with a released bootloader and Rockbox Utility support.[18]
- Rockbox supports the device; iPodLinux supports it only partially.[7]
- Rockbox is a free open-source replacement for the original firmware that in many cases can be used without removing it, and plays formats such as FLAC and Ogg Vorbis.[19]
Guides:No guide found yet.
Display replacementWorks
Replace a cracked or faulty color display. Photo boards differ from monochrome 4th gen: five logic-board screws and a more central display connector.[3]
Special tools: iPod opening tool, spudger, T6 Torx
Good to know
- On a Photo the display connector sits more centrally on the logic board than on a plain 4th gen, and there are five logic-board screws instead of six.[3]
- Mild adhesive may hold the display to the front panel. The headphone jack ribbon is fragile.[3]
Guides:iPod 4th Generation or Photo Display Replacement - iFixit
Front panelWorks
Replace the plastic front half of the case after opening and disconnecting internals.[6][5]
Special tools: iPod opening tool, spudger, T6 Torx
Good to know
- The front panel is the plastic front half of the case. Opening uses the same seam-tab steps as the rear-panel guide.[6][5]
Guides:iPod 4th Generation or Photo Front Panel Replacement - iFixitiPod 4th Generation or Photo Rear Panel Replacement - iFixit
DIY line-out (iMod-style)Experimental
- ⚠ Soldering Needs a soldering iron. Heat can lift pads and burn skin.
- ⚠ Permanent change Cuts, drills or glues the device. You cannot undo it.
Tap Wolfson WM8975 LOUT2/ROUT2 through small capacitors to the headphone jack for a cleaner line-level feed. Surface-mount work; one 2012 Photo write-up.[11]
Good to know
- 4th gen iPods use a Wolfson WM8975. One Photo build ran wires from LOUT2 and ROUT2 through capacitors to the headphone jack.[11]
- The mod removes the output resistors from the Wolfson DAC, needs rare Black Gate capacitors, and may require removing the dock sleeve for space.[11]
⚠ Watch out
- Do not attempt without surface-mount soldering experience.[11]
Sources (19)
- official iPod photo (40 GB, 60 GB) - Technical Specifications - Apple Support · 2026-11-17
- official Apple Introduces iPod photo - Apple (UK) · 2026-11-17
- docs iPod 4th Generation or Photo Display Replacement - iFixit · 2026-11-17
- docs iPod 4th Generation or Photo Battery Replacement - iFixit · 2026-11-17
- docs iPod 4th Generation or Photo Rear Panel Replacement - iFixit · 2026-11-17
- docs iPod 4th Generation or Photo Front Panel Replacement - iFixit · 2026-11-17
- wiki iPod photo - The Apple Wiki · 2026-11-17
- wiki iPod photo - iPodWiki · 2026-11-17
- docs iPod photo (40/60) Specs - EveryiPod.com · 2026-11-17
- docs iPod Photo - Low End Mac · 2026-11-17
- blog How to imod a 4th Gen iPod photo - Be Aware · 2026-11-17
- official iFlash.xyz – home of the iFlash Adapter · 2026-11-17
- shop iFlash-ATA1 – iFlash.xyz · 2026-11-15
- shop 4th Gen iPod Converter – iFlash.xyz · 2026-11-15
- shop iFlash-Quad – iFlash.xyz · 2026-11-15
- docs Prepare SDXC (ExFat) for use with the iPod – iFlash.xyz · 2026-11-15
- docs iPod 4th generation or Photo hard drive replacement by micro SD card - iFixit · 2026-11-15
- wiki TargetStatus – Rockbox · 2026-11-15
- wiki Rockbox - Wikipedia · 2026-11-15