Home › Devices › Nintendo › Game Boy Advance SP
 NEW!
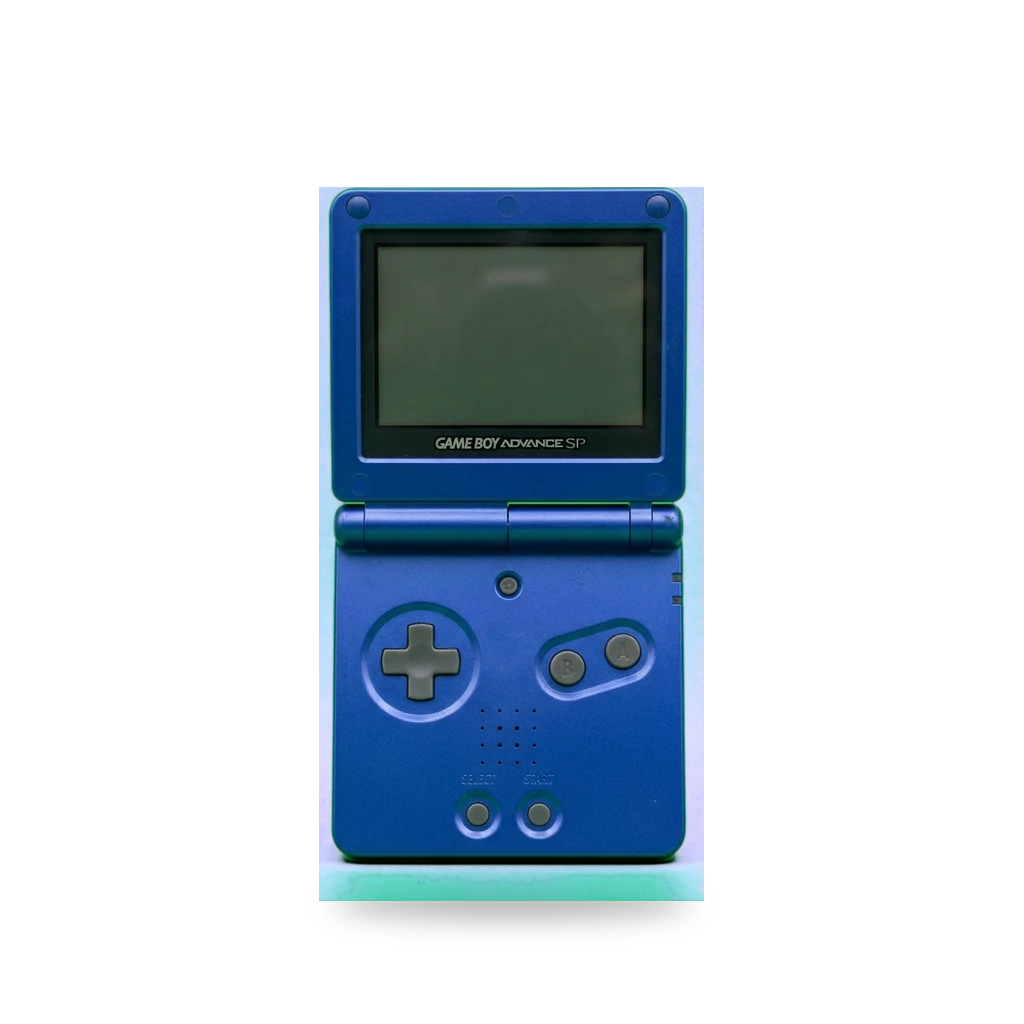
Photo: Jzh2074, CC BY-SA 4.0 · AI-edited (studio background)
 2.jpg)
NINTENDO · HANDHELD CONSOLE · 2004-2005
Game Boy Advance SP
Also called: GBA SP · AGS-001 · AGS-101
Folding Game Boy Advance with a built-in rechargeable lithium-ion battery. It was the first Nintendo handheld with a rechargeable battery instead of disposable cells. The front-lit AGS-001 was released on March 23, 2004. The back-lit AGS-101 was released in September 2005.[1][2]
Which one do I have?
Specs
Mods (9)
⚠ Mod at your own risk. We collect what others have published; we have not tested these mods. Read the safety notes
Flash cartridgeWorks
- ⚠ Check the law May break a law or rule where you live.
A Krikzz EverDrive GBA Mini plugs into the cartridge slot and runs your own cartridge backups. The case stays closed.[10][1]
Parts
- EverDrive GBA Mini Fits — Plugs into the Game Boy Advance cartridge slot on the front-bottom edge.[10][1]
Good to know
- The cartridge has 256 Mbit (32 MB) of PSRAM, 1 Mbit (128 KB) of SRAM for saves, a real-time clock, FAT32 support, low power use, and gold-plated contacts.[10]
- Every save type works without a patch. Krikzz says most games load in 1 to 2 seconds.[10]
- It works with the GameCube player, some revisions of the Super Retro Advance adapter, and other Game Boy Advance accessories.[10]
⚠ Watch out
- Krikzz does not guarantee every console clone, especially later clones.[10]
Guides:No guide found yet.
New batteryWorks
- ⚠ Lithium battery Uses or touches a lithium cell. A damaged cell can catch fire.
Replace a cell that will not hold a charge. One captive screw opens the battery cover. No soldering.[2]
Special tools: JIS 00 screwdriver
Good to know
- The SP uses a lithium-ion battery. Replace it if the unit will not turn on or dies quickly.[2]
- A JIS 00 screwdriver loosens the captive screw on the battery cover. Lift the cell out by the tab on its left edge.[2]
⚠ Watch out
Guides:Nintendo Game Boy Advance SP Battery Replacement - iFixit Repair Guide
1040 mAh batteryExperimental
- ⚠ Lithium battery Uses or touches a lithium cell. A damaged cell can catch fire.
A drop-in 1040 mAh lithium-polymer pack from Makho and FunnyPlaying. No assembly. It fits an original shell or a FunnyPlaying shell.[3][2]
Special tools: JIS 00 screwdriver
Parts
- FunnyPlaying 1040 mAh LiPo (Makho MaxPlay) Fits with conditions — Fits an original shell or a FunnyPlaying shell. Other aftermarket shells are not guaranteed.[3] Buy: retrogamerepairshop.com
Good to know
- The pack needs no assembly and fits both FunnyPlaying shells and the original SP shell.[3]
- The seller says a test ran 8 to 10 hours, including in a modified console.[3] unverified
⚠ Watch out
Guides:Nintendo Game Boy Advance SP Battery Replacement - iFixit Repair Guide
New speakerWorks
- ⚠ Lithium battery Uses or touches a lithium cell. A damaged cell can catch fire.
Replace a speaker that crackles, distorts, or stays silent. The battery comes out first, then six tri-point screws release the bottom shell. The motherboard is unscrewed and flipped up to reach the speaker.[4][2]
Special tools: JIS 00 screwdriver, tri-point Y0 screwdriver, spudger
Good to know
- Replace the speaker if you hear distorted audio, crackling, or no sound.[4]
- After the battery is out, a tri-point Y0 screwdriver removes six screws: four 6.3 mm recessed screws and two 4.6 mm screws. After the three motherboard screws come out, the board flips up over the hinges and the speaker lifts out with a spudger.[4]
⚠ Watch out
Guides:Nintendo Game Boy Advance SP Speaker Replacement - iFixit Repair Guide
New hingesWorks
Replace the hinge barrels if the lid will not stay open, or if it does not open and close smoothly.[5]
Special tools: JIS 00 screwdriver, tri-point Y0 screwdriver
Good to know
- Worn hinge barrels (also called hinge axles) are the part to change when the screen will not stay open, or the hinge does not move smoothly.[5]
⚠ Watch out
- The screws are JIS. A Phillips driver can strip them.[5]
Guides:Nintendo Game Boy Advance SP Hinges Replacement - iFixit Repair Guide
Original screenWorks
Fit a new original LCD if the picture is dead, discolored, lined, or blank. Check the plastic lens first. A cracked lens is a different repair.[6]
Special tools: JIS 00 screwdriver, tri-point Y0 screwdriver
Good to know
- Replace the LCD if it is dead, unresponsive, discolored, has dead pixels or lines, or shows no image.[6]
- This guide fits an original LCD. Some IPS kits need soldering, other changes, or a new shell. The same guide still gets you to that point.[6]
⚠ Watch out
Guides:Nintendo Game Boy Advance SP Screen Replacement - iFixit Repair Guide
Laminated IPS screenExperimental
FunnyPlaying's 3.0 inch IPS M2 kit is a laminated panel with an on-screen menu. Touch runs the menu. A soldered brightness button is optional. The original-shell version goes in the original housing.[7][6]
Special tools: JIS 00 screwdriver, tri-point Y0 screwdriver
Parts
- FunnyPlaying 3.0 inch IPS GBA SP backlight kit M2 Fits with conditions — The original-shell lens goes in the original housing. The custom-shell lens uses FunnyPlaying's mirror housing.[7] Buy: funnyplaying.com
Good to know
- The panel is a 3.0 inch laminated IPS. FunnyPlaying rates it at 99% of sRGB and 500 cd/m². At the lowest brightness the kit uses 0.27 W.[7]
- The kit includes the laminated panel, a main ribbon, and a welding line. The on-screen menu has power-off memory, more display effects, and a mixed-frame switch. Touch runs every menu function. Welding a physical button is optional.[7]
- The original-shell version has no bracket and can go in the original housing. Three anchor points are already prepared. The custom-shell version uses FunnyPlaying's mirror housing, which comes with a holder.[7]
- iFixit's screen guide stops at an original LCD. Some IPS kits need soldering, other changes, or a new shell.[6]
⚠ Watch out
- The screws are JIS. A Phillips driver can strip them.[6]
Guides:No guide found yet.
New shellWorks
Move the board and parts into a new shell. The guide also covers new buttons, membranes, and a lens. It stops before any soldering.[8]
Special tools: JIS 00 screwdriver, tri-point Y0 screwdriver, spudger
Good to know
- A reshell swaps the outer plastic and moves the internals across, usually for a new color. It can include new buttons, membranes, and a screen lens.[8]
- You can change the screen or the motherboard in the same opening. This guide does not cover the soldering those upgrades usually need.[8]
⚠ Watch out
- The screws are JIS. A Phillips driver can strip them.[8]
Guides:How to Reshell Your Game Boy Advance SP - iFixit Repair Guide
USB-C chargingExperimental
- ⚠ Soldering Needs a soldering iron. Heat can lift pads and burn skin.
- ⚠ Lithium battery Uses or touches a lithium cell. A damaged cell can catch fire.
A small board replaces the charge port with USB-C. The maker ships it assembled. You desolder the old port and solder three points. It fits the AGS-001 and the AGS-101.[9]
Special tools: soldering iron
Parts
- rorosaurus GBA SP USB-C board Fits — Works on the AGS-001 and the AGS-101. The maker ships the board assembled.[9]
Good to know
- Any USB-C cable and charger can charge it, including C-to-C. It also works with USB-A to USB-C cables, Quick Charge, and USB Power Delivery. A charger that offers 9 V or 12 V stays at 5 V for this console.[9]
- The original charger, AGS-002, supplies up to 320 mA at 5.2 V. This board allows up to 500 mA at 5 V. The maker says that is not slower than the original charger.[9]
- The board leaves the other charge-port pads free, so a 3.5 mm headphone mod can still use them. The same board also fits the original Nintendo DS (NTR-001).[9]
- A small 3D-printed piece fills the gap left by the smaller port. It can friction-fit, or you can glue it. It may need sanding. Assembly steps are in INSTALLATION.md in the same project.[9]
⚠ Watch out
- Modify the console at your own risk. The board is provided as-is, with no warranty.[9]
Guides:No guide found yet.
Sources (11)
- wiki Game Boy Advance SP Repair Help: Learn How to Fix It Yourself. · 2026-11-14
- docs Nintendo Game Boy Advance SP Battery Replacement - iFixit Repair Guide · 2026-11-15
- shop FunnyPlaying GBA SP Rechargeable 1040mAh LiPo MaxPlay Battery – Retro Game Repair Shop · 2026-11-14
- docs Nintendo Game Boy Advance SP Speaker Replacement - iFixit Repair Guide · 2026-11-15
- docs Nintendo Game Boy Advance SP Hinges Replacement - iFixit Repair Guide · 2026-11-15
- docs Nintendo Game Boy Advance SP Screen Replacement - iFixit Repair Guide · 2026-11-15
- shop 3.0 Inch IPS GBA SP Backlight Kit M2 – FunnyPlaying · 2026-11-15
- docs How to Reshell Your Game Boy Advance SP - iFixit Repair Guide · 2026-11-15
- official GitHub - rorosaurus/gba-sp-usb-c: PCB to replace GBA SP's charging port with USB-C · 2026-11-15
- official EverDrive GBA Mini · 2026-11-15
- shop IPS LCD for Game Boy Advance SP — Retro Modding · 2026-11-14