Home › Devices › Nintendo › Nintendo DS Lite
 NEW!
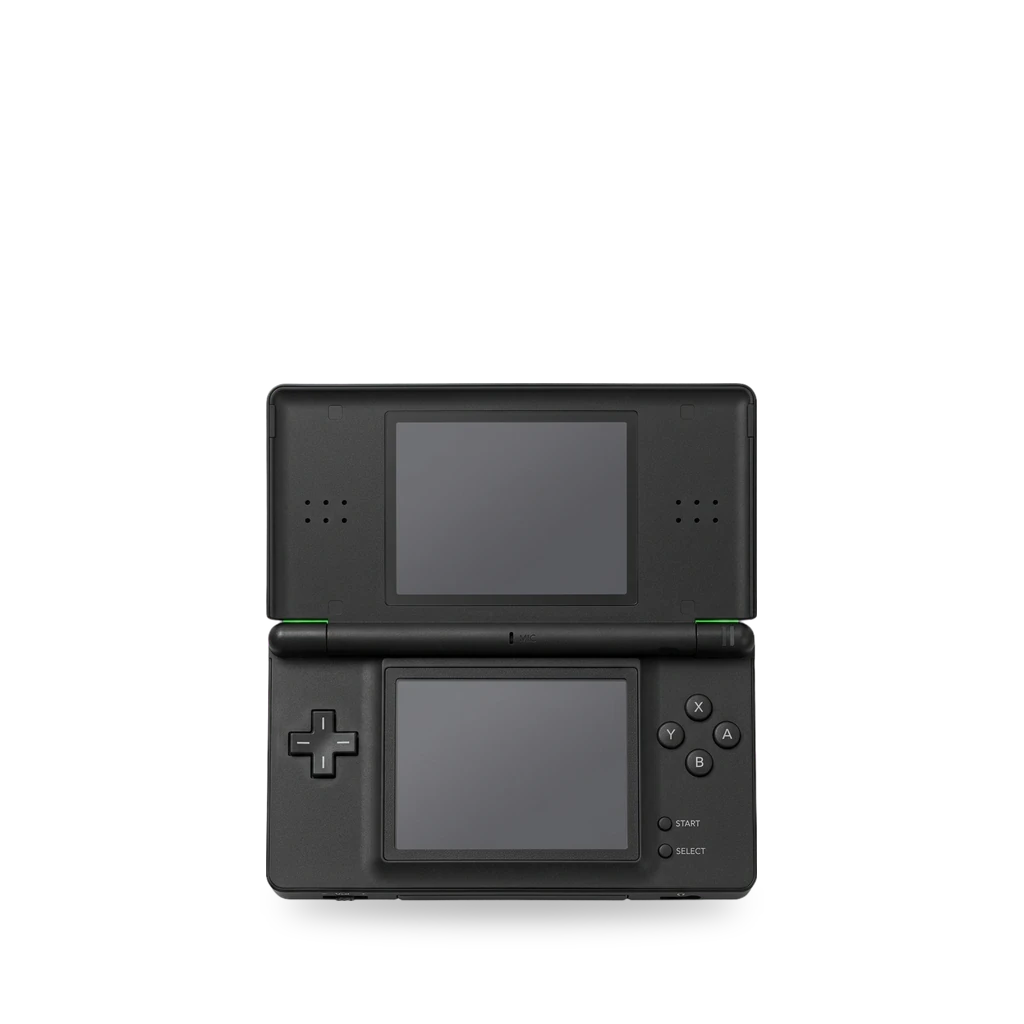
Photo: Evan-Amos, CC BY-SA 3.0 · AI-edited (studio background)

NINTENDO · HANDHELD CONSOLE · 2006
Nintendo DS Lite
Also called: DS Lite · NDSL · USG-001
The slimmer 2006 redesign of the original Nintendo DS. The back label reads Nintendo DS Lite and the model number USG-001. The lower screen is a touchscreen. It plays DS games and Game Boy Advance games.[1]
Which one do I have?
| Model | Variant | Year | How to tell |
|---|---|---|---|
| USG-001 | DS Lite | 2006 | The label on the back says Nintendo DS Lite and lists USG-001. It is slimmer than the original DS, and the lower screen is a touchscreen.[1] |
Specs
Mods (8)
⚠ Mod at your own risk. We collect what others have published; we have not tested these mods. Read the safety notes
Dump your own cartridgesWorks
- ⚠ Check the law May break a law or rule where you live.
A DS Lite can dump your own DS cartridges. The steps are in the dumping guide.[3]
New batteryWorks
Replace a pack that no longer holds a charge. One captive Phillips screw holds the battery cover. A spudger lifts the cover and the cell.[4]
Special tools: Phillips #00 screwdriver, spudger
Parts
- Nintendo DS Lite battery Fits — Pack behind the battery cover on the lower case.[4]
Good to know
- The cover screw stays captive. Pry the cover up with a spudger or a fingernail, then pry the cell out.[4]
Guides:Nintendo DS Lite Battery Replacement - iFixit Repair Guide
New upper caseWorks
Replace a scratched upper case so the lid looks new again.[5]
Special tools: Phillips #00 screwdriver, tri-point Y1 screwdriver, spudger
Guides:Nintendo DS Lite Upper Case Replacement - iFixit Repair Guide
New lower screenWorks
Replace a dead lower LCD. The touchscreen ribbon latch must stay at 90 degrees or less.[6]
Special tools: Phillips #00 screwdriver, tri-point Y1 screwdriver, spudger
⚠ Watch out
- Flip up the touchscreen ribbon latch, not the socket. Do not lift the latch more than 90 degrees, or it breaks off.[6]
Guides:Nintendo DS Lite Lower LCD Replacement - iFixit Repair Guide
New upper screenWorks
- ⚠ Soldering Needs a soldering iron. Heat can lift pads and burn skin.
Replace the upper LCD. The ribbon has to pass through the hinge. iFixit rates this job as difficult and about 2 to 3 hours.[7]
Special tools: Phillips #00 screwdriver, tri-point Y1 screwdriver, spudger
Good to know
- The upper LCD ribbon goes through the display hinge.[7]
⚠ Watch out
- Flip up the touchscreen ribbon latch, not the socket. Do not lift the latch more than 90 degrees, or it breaks off.[7]
Guides:Nintendo DS Lite Upper LCD Replacement - iFixit Repair Guide
USB-C chargingExperimental
A small board from rorosaurus replaces the charge port with USB-C on a USG-001. Any USB-C cable can charge it, including C-to-C. It is not for the original DS.[8]
Parts
- rorosaurus DS Lite USB-C board Fits — For any USG-001. Not for the original Nintendo DS (NTR-001).[8]
Good to know
- It works with C-to-C cables, USB-A to USB-C cables, Quick Charge, and USB Power Delivery. A charger that offers 9 V or 12 V stays at 5 V for this console.[8]
- The original charger, USG-002, supplies up to 450 mA at 5.2 V. This board allows up to 500 mA at 5 V. The maker says that is not slower than the original charger.[8]
- Assembly steps are in INSTALLATION.md in the same project.[8]
⚠ Watch out
- Modify the console at your own risk. The board is provided as-is, with no warranty.[8]
Guides:No guide found yet.
Soldered USB-C connectorExperimental
- ⚠ Soldering Needs a soldering iron. Heat can lift pads and burn skin.
A giltesa connector solders straight onto the DS Lite main board in place of the original power jack. The repository hosts a PDF guide and does not include the design files.[9]
Special tools: soldering iron
Parts
- giltesa DS Lite USB-C connector Fits — Solders directly to the main board. The repository is the PDF guide, not the design files.[9]
Good to know
- The connector replaces the original power jack and solders directly to the main board.[9]
Guides:GitHub - giltesa/Nintendo-DS-Lite-USB-C-Mod: The Nintendo DS Lite USB-C kit
Sources (11)
- wiki Nintendo DS Lite Repair Help: Learn How to Fix It Yourself. · 2026-11-14
- docs Installing TWiLight Menu++ (Flashcard) | DS-Homebrew Wiki · 2026-11-14
- docs Nintendo DS / Nintendo DSi - Dumping Guide · 2026-11-14
- docs Nintendo DS Lite Battery Replacement - iFixit Repair Guide · 2026-11-15
- docs Nintendo DS Lite Upper Case Replacement - iFixit Repair Guide · 2026-11-15
- docs Nintendo DS Lite Lower LCD Replacement - iFixit Repair Guide · 2026-11-15
- docs Nintendo DS Lite Upper LCD Replacement - iFixit Repair Guide · 2026-11-15
- official GitHub - rorosaurus/nds-lite-usb-c: A USB-C port for the Nintendo DS Lite · 2026-11-15
- official GitHub - giltesa/Nintendo-DS-Lite-USB-C-Mod: The Nintendo DS Lite USB-C kit · 2026-11-15
- shop Nintendo DS Lite Laminated IPS Top Screen - Cloud Game Store - Hand Held Legend · 2026-11-14
- shop RetroGlow for Nintendo DS Lite | RGB LED Flex Board | Hand Held Legend · 2026-11-14